Mr. Tom, as I'll call him, was pleased with his costume. He passed my cards around to his fellow players and soon I was getting calls for the next production- Beauty and the Beast, Jr. I tend to take on more than I can sanely handle and that is exactly what I did. I not only said "yes" to everyone who asked, but I offered to do more. That is how I got the opportunity to do a more complicated costume duo.... Mrs. Potts and Chip.
Here is the process of making them, from conception to birth:
My initial sketch.
The bare bones of Mrs. Potts. I used pipe insulation and duct tape.
Fitting the batting to the skeleton. Notice I am working in the evening.
Getting the satin skirt fitted. Night has fallen. I do my best work in the wee hours of the morning.
After adding the gold strip. A new day.
Here, I've added the appliques. I used Heat n' Bond to apply them. Later I found that a fabric adhesive would have been better. The satin and the gold lame had issues adhering and had to be reglued. This is because you cannot super-heat the tissue lame and satin. Cotton holds up fine and stays put.
The teapot lid hat. I used a straw hat as the base, along with foam core board, styrofoam, and lots of spray adhesive and fabric glue.
Here you can see the inner skeleton of the teacup.
I glued and hand-sewed the fabric around the brim.
Almost finished.
Close-up of the appliques.
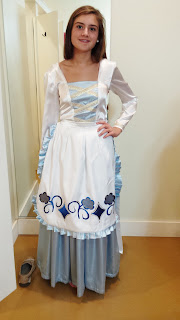
Here is the dress that goes under the teapot.
And the suit under the teacup.
And here are the finished products and the talented actors that brought them to life. You'll notice in the pictures onstage that I remade Mrs. Potts' spout to a curvier and fuller style. Much better!

And here are the other costumes I made.
The children really carried them off so well.

I want to give a shout out to Beth Glisson Photography for the stage pictures.


